Showing posts with label dolls. Show all posts

Friday, May 23, 2014

Fairy tales come true!

Wow! It has been a busy few weeks. You may have noticed my absence from the blogosphere. Moving house has taken up much of my time and I am heartily sick of boxes by now! I can't wait to pack the last empty one into the recycling pile. 

Life has not been all about moving. I have also been teaching. The Canadian Embroiderer's Association held their annual conference in Ottawa and I was invited to teach there. I had a fun time with my great group of students!  It was like a holiday in the midst of all that's been going on lately. To dip back into my wools and show people the joys of needle felting. 

The class was called Fairy Tale Felt Folks. We had two days to get all the wonderful characters to emerge and progress to being finished. I'm happy to report that nearly all of the pieces were finished. That left everyone with a good sense of accomplishment. Me too! It didn't take long before the students opted to stay in the classroom over break times and keep working. I love it when people get keen right away!

So here are the results. My own character was Puck, but while he made a great demo piece, he has yet to be finished!
We had a couple of Puss In Boots, and Crooked Men, some mythical figures and loads of imagination!


Friday, March 7, 2014

Pattern review- Calliope


I just got this pattern in my inbox, from Paula McGee. I thought I'd do a review today. First, it's a cloth doll pattern, which makes a doll about 18" tall seated and 28" tall standing.  Her name is Calliope, which is dreamy! The pattern is well written, with both illustrations and photos. Paula's signature face is what gives the doll such fabulous appeal.

There are patterns for the doll and her costume. There's even a template for drawing the face. Along with the photos, even novice doll makers will be able to produce a lovely face for their doll.

The whimsical costume and pink hair top off the doll. I just love the boots! Those are inspirational. Hey, I bet in another color way, it would look positively Steampunk!  I digress! Do try this pattern. you won't be disappointed. 

Available at Doll  Street Dreamers. Order the pattern right here.

Friday, February 28, 2014


It's so great when you find something on sale! Judy has offered us a 15% discount on this class until the end of this weekend! In this class, apart from making a lovely mermaid, you will learn Judy's secrets for making beautiful faces and elegant hands. There's also beading, costume illusions and so much more! Register right here!

Who can resist the siren call of the mermaid? The first stories appeared in ancient Assyria (according to Wikipedia), in which the goddess Atargatis transformed herself into a mermaid out of shame for accidentally killing her human lover. Mermaids are sometimes associated with perilous events such as floods, storms, shipwrecks and drownings. In other folk traditions (or sometimes within the same tradition), they can be benevolent or beneficent, bestowing boons or falling in love with humans. I liek the last part the best!

How about you? Ready to flex your creative fins and create a mermaid?

Friday, January 17, 2014

Divas rule!

I'll be teaching online again soon. At the end of January, Doll Street will host another needle felting class. Create your own Diva! I will take you step by step through the technique of needle felting and show you how to sculpt the face with wool fiber and create and develop the body parts. Finally, we will make interesting poses, like the diva shown here.

I'm also offering a kit, for those who need one. Just let me know the color you want. I always advise against making a flesh tone diva. using a non-traditional color takes the pressure off trying to make a realistic face and body.

Class begins January 31, 2014. Follow the link to register today.

Tuesday, January 14, 2014

Pas de deux online class

I am excited about this online class from Barbara Schoenoff. Barbara is a master cloth doll maker and shows it with this lovely couple. The class will lead you step-by-step through the making and costuming of each doll. So it's kind of a two-for-one deal, since the class creates both dolls.

The dolls are dressed in 18th century costumes and the couple both are wearing powdered wigs and make up.

Class starts February 7 on Doll Street Dreamers. Follow the link to register.

Friday, January 10, 2014

I've been published!

Soft Dolls and Animals has published my Flat Felicity article in their Feb/Mar 2014 issue. I'm so excited!
It all started with a swap on Doll Street Dreamers. Our online doll club decided to do a Flat Stanley Round Robin. Our group has doll artists all over the world joining in. We each made a flat doll, designed to go in an envelope with a journal to accompany it on the journey. Each month, we get a doll, add one item to it, write in the journal and send it along to the next person. It may be a year before we get our well traveled dolls back! Oh the things they will do and the places they will see!

Flat Felicity is based on the doll I put into my envelope. So now she is available to share with you, via the magazine. maybe you'll start your own swap? It's a lot of fun!

Tuesday, January 7, 2014

Doll making adventures!

Doll Street is presenting a new designer this month: June Crawford. I found this talented designer on Etsy. June is bring this fabulous class to us, which uses polymer clay and old books to create this imaginative doll.

Register by clicking this link to the class.

Here's a little about June, in her own words:
"I am a mostly self taught artist, unless you count the art classes in high school….where my teacher often looked at what I had created and, scratching his beard, would say... "Interesting". A unique classification he used when he just couldn't label it anything else.

But coming from a creative family, it was just something natural to do. My father's Mother was a quilter who created the most amazing works of art, as had her own Mother. I have knit lace that my Great-Grandmother made just after the turn of the last century and I have a needlework set she had begun, but never finished due to her untimely passing. Her daughter, my Grandmother, stitched and she passed that knowledge to me. My grandfather drew and painted in water color. He also was a musician, as were all of his brothers, something I wish I had learned more about. My own Mother never learned to knit or make lace, but she took up sewing and ceramics. My sister and I have somehow become a conglomeration of all of that past. From an early age I was making pots and statues from mud…as I've grown my tools have changed, now I use polymer clay so those things will be far more durable and much less dusty. Anything is game ….I see magic in almost everything and I am passing that on to my own son and daughter who are artists in their own right. 

People often ask me how I am inspired. I wish I understood myself. Shadows of the leaves playing over a rock, on a sunny day. The sound of the birds chirping waking me before dawn on a spring morning, the new green of spring grass, wild violets, the giggle of a child….light, color, texture...everything is inspiring. Somehow, somewhere in the ether of my mind, those things mix together and eventually end up a new project. Often I begin with no more than a desire to create. Sometimes I have a very vague idea of what I want the end product to be, other times I see the finished piece clearly before I begin. And sometimes, what I end up with isn't at all what I had in mind when I began. I think, for me, it isn't so much about what is created as it is the process of creating. It's almost like you bring a tiny piece of your soul to the physical world when you do that. And the greatest reward of all is seeing how that can touch another person. "

Wednesday, November 13, 2013

Doll costuming at its best!


Barbara Schoenoff brings us this  costuming class with a difference. Not only will you make Paulina, the cloth doll, but her clothing is removable! It's being hosted by Doll Street Dreamers.

Paulina is a 20” cloth doll inspired by the soft edged, dreamlike, lovely women painted by Renoir. Paulina’s body is darted and intricate giving her the curves and contours of her time. Her 1880’s walking suit and underwear are fully removable allowing for more clothing to come.
An intermediate skill level in sewing would be helpful but not absolutely necessary. Most important is bringing a desire to make a doll and explore.
Techniques include pattern piecing, articulating fingers, face sculpting and painting, wire armature, bustle gown making and embellishment. .


The class will flow as follows:
Lesson One

  • Supply list and selection of materials
  • Discussion of sewing terms
  • Basic techniques
  • Making the body

  • Lesson two
  • Armature
  • Legs and Feet
  • Stuffing
  • Attaching limbs

  • Lesson Three
  • Head
  • Sculpting the Face
  • Coloring the Face
  • Attaching the Head to Body

  • Lesson Four
    Underwear; pantalets, camisole, petticoat and stockings

    Lesson Five
  • Skirt
  • Jacket

  • Lesson Six
  • Shoes
  • Spats
  • Hat
  • Finishing
  • There are lots of photos of the construction and easily followed step-by-step instructions – and of course, a classroom where you can discuss and share your progress. So join in and have some fun and let Barbara guide you through this enjoyable journey.


    Class begins November 15, 2013 Won't you join us? Click to Register


    Friday, November 8, 2013


    After the mermaid contest this summer, Studio Galli gave me one extra video. So I thought a great way to give it away would be to one of the new members of Doll Street Dreamers. As you may know, Doll Street has an online doll club. members chat to each other daily, through our email journal. We have swaps and challenges. Last year our Wizard of Oz dolls went to Artistic Figures in Cloth Conference. They were well received, I can tell you.

    What have I learned since I joined Doll Street's club 12 years ago? I have learned that there are so many different types of dolls out there, that many talented people at all levels of doll making are in the club. I've made online friends and met several of them in person since, all due to Doll Street. And of course, last September, I became the Grand Poobaa of Doll Street and took over the running of the site.

    Now you don't have to be a member to buy a pattern or take a class from one of our talented designers, but I know you'll love the club and the camaraderie that I have found there. We have members from all over the world! The club has its own Clubhouse, with a library of articles and even free patterns! Members get special discounts from time to time, too!

    So come on, won't you join us? You might be the one to win the DVD by Patti Medaris Culea! I've seen it and it is amazing!

    Friday, September 6, 2013

    Fall is a great time for learning!


    Well, it's been one year since I took over the reins at Doll street Dreamers. What a ride it's been! I've learned so much and met such wonderful people: the members of the Club, the amazing doll designers and teachers who are such a big part of Doll Street; the students of the classes, the doll makers who populate this creative street. 

    I want to thank you all for offering your help, advice and support. Most of all for your support. You guys are the Best!

    Fall is the best time to get rolling on a new creative journey. What better way than with online classes? September and October are brimming with new beginnings. I thought today I'd introduce just three of them.

    Judy Skeel brings us a series of online classes, one of which is Faerie Couture. You get to create the mannequin and dress it in an amazing one of a kind costume. plus, the wings! If you have a fairy waiting for a new dress, this is the class for you!


    For those who love Halloween, Judith Prior brings us Winnie Witch. This doll stands by herself, has a full outfit and a broom. The face is sculpted and painted.  I think she's kind of lovable. What a fun gift for the young ones!


    Kathryn Walmsley is a NIADA member and an excellent sculptor in clay. This online class, Guerrilla Mold Making, answers a problem I know I've had: how to replicate something. In this online class, Kathryn shows you how to make a mold and use it to create multiples of objects in clay. Perfect for duplicating dolls and accessories. Kathryn also has a series of doll making classes, leading you to create a complete doll.

    You can join the fun by clicking the images or visit Doll Street Dreamers and explore the world of doll making there!

    Sunday, July 14, 2013

    Steampunk fun!


    This Saturday, I was a vendor at the Ottawa, Valley Crafts and Collectibles Show, along with my friend, artist Choleena DiTullio. Since we both love steampunk and had created art along the theme, we decided to dress the part.
     
    I had created a corset and a bustle. Choleena had some fun antique jewellery for us to wear. I found a couple of vintage blouses to complete the outfits. We had a little rehearsal, organized our headgear and we were ready. I made a mini hat for a doll making demo I did last month. Choleena took it and gave it a makeover into a fascinator. 

    Here are the results!


    Here's a sample of Choleena's unique paper mosaics. 


    Friday, June 28, 2013

    Female anatomy

    Female Anatomy by Amanda Day

    Female Anatomy for the Artist


    Female anatomy can be a handful to sculpt. However, it can be greatly improved just by following some simple rules.
    When I first started sculpting, I found my biggest hurdle was trying to get the human proportions correct. One problem I still struggle with is making sure the torso is long enough.
    Everyone struggles with something.
    So how can you make anatomically correct dolls?

    The Female Body


    Firstly, you need to understand some basic rules for the female anatomy. Let me illustrate:
    You can't really say that a female doll will be 6 inches or 12 inches tall, because every doll can be a different size. So instead, we will measure in "head lengths".
    Depending what you feel is the ideal body proportions the female body can be 7 heads tall, 7 1/2 heads tall or 8 heads tall, depending what preferences are.
    This means that if you measure how large the doll head is, you can then calculate how tall the doll needs to be to be in proportion.
    In the sketch I've done, the figure is approximately 7 and a half heads tall. Using this method, you are able to calculate the correct proportions for the female figure no matter what scale your doll is.
    Using the drawing as a guide, you can also determine how many heads each section of the body takes up.
    For example, the body can take up approximately 2 1/2 heads whilst the legs can take as much as 3 and a half heads. This helps you ensure the legs you create aren't too short for the body. Using this basic concept, you have the building blocks for any female figure.
    If you're anything like me you rather having important information in point form. So here are some facts about female anatomy that I have accrued through the years:
    * Adult Females can be 7 heads, 7 1/2 heads or 8 heads tall.
    * Because women have narrow shoulders, the shoulder width on either side of the head is 3/4 head width (sometimes 1 head width but I find it looks nicer for female sculptures to have just under 1 head width).
    * The legs are approximately 3 1/2 heads tall.
    * When the hands a dropped by the side of the body, the finger-tips reach half-way down the outer thigh.
    * The naval (belly-button) is located just above the hip bone, or just past half-way down the whole body section.

    The Female Face


    The face can take longer to create than the rest of the human body. So many muscles are at work in the face and this can make it tricky. There are 6 main rules to being able to pull off a realistic face...
    1. The eyes are located halfway down the head.
    2. The more symmetrical a face is, the more attractive it is.
    3. The top of where the ears join the head is in-line with the corner of the eyes.
    4. When looking at the face from the front, the distance from the outer corner of the eye to the side of the face should be half an eye width.
    5. The corners of the mouth should be approximately in-line with the pupils.
    and most the most important rule for learning female anatomy...
    6. Always use a photo reference!

    The Importance of Referencing


    To this day I still use photo references while sculpting my dolls. It is very difficult to get female anatomy to look correct without it, and this is why:
    When we look at people from day to day, our minds take in important details that help us distinguish one person from the next.
    We take in eye shape, unique moles or scars, overall body shape and hair colour. Our brains are made to filter out any "unimportant" information, such as general anatomy, as this is relatively the same for everyone.
    However, these details that our minds block out are the details that we need to recreate.
    This is why many people who sculpt from memory tend to make vital flaws in the female anatomy, ESPECIALLY when it comes to sculpting the face.
    Without photo references I would be bound by the limits of my knowledge, which is determined the appearance of my first dolls. If I kept sculpting without ever using a reference, I would have kept creating the same flaws. I would have never improved my abilities.
    I know it is tempting to just start creating, but to drive yourself to improve, you really need to study photographs with sincerity.
    This can take effort, but you will be able to locate errors in your creations faster, which means you will learn to fix them.
    Soon you will be creating anatomically correct dolls and awkward looking dolls will be a thing of the past.

    Friday, May 3, 2013

    Wire

    Well I learned something new! On Doll Street's club Journal, we were having a discussion about armature wire. We often have a Topic Of the Week. This one was most fruitful. I knew about aluminum wire and have used old electrical wire, which is copper. I knew not to use old coat hangers, because they are hard to bend and can snap.

    What do you need to consider with armature wire? You need it to be strong enough to hold up the figure, bendy enough to be easy to work with, and it must not rust  You never know, but your doll may get wet at some point, or be subject to humidity.

    Gauge is also important. Size 18 seems to be the most popular. 20 or 22 is thinner and okay for arms. Chenille stems are good for hands and can be used for small dolls. They can even be braided together for strength on a small figure. the electrical wire I use comes covered. When you strip the cover, you get two coated wires and a copper ground wire. I find this works very well and I'm recycling old wire, which makes me feel good!

    Now here's the new thing I learned: bonsai wire comes in copper and aluminum. It comes in different gauges and is cheap! If you buy wire at the art store or hardware store, you can pay big bucks for it. This stuff can be found at some hardware stores and online - cheap! I like that! So that's my next purchase, once I use up the electrical wire that I have.

    What kind do you use?

    Monday, April 22, 2013

    Patti Medaris Culea video

    Cloth Doll Inspirations with Patti Medaris Culea
     
    This is the second video on doll making from Patti.
    This video continues to inspire, just as the first one did. Patti leads us through her process of costuming and draping fabric to clothe your doll. You'll soon be flying solo, inspired by Patti's easy methods of draping and pattern making. The face painting techniques add new ways of using products like watercolors to your skill set. It's a great look inside Patti's world, at her techniques, her process and her inspirations. I'm inspired!
     
    Galli Studios, who produced the video, are one of our sponsors for the Doll Street mermaid challenge. Make a mermaid and win a prize! I like the sound of that. Follow the link to read more about the challenge and the prizes.

    Monday, March 4, 2013

    Bane of my existence

    I have been bookkeeping for hours. Sorted out a glitch in my method which took a while. Paid my bills and didn't do anything creative today, except get my newsletter organised.

    It was a welcome relief, to look at what other designers are doing, especially when I am not doing anything. Take Sherry Goshon. Her work has a beauty to it, a dreamy quality. I am organising a mermaid challenge (with prizes!) on Doll Street. Sherry stepped right up and offered her Tashina class. Isn't she a beauty? I'm inspired, even if I can't get near a mermaid today.


    Visions of creations can dance in my head while I deliver rented costumes back to the theatre I borrowed them from...

    What a day! Do you like month end?

    Friday, February 22, 2013

    Creager studios

    I had to share this video with you. First of a series about the Creagers work, which needs little introduction from me.

    Friday, January 11, 2013

    Steam punk again!

    I am so excited to share this news- not one, but three of my Steampunk pieces are in the new magazine from "Just Cards."

    There are so many familiar names from the doll making world. Christine Shively-Benjamin, Mary Ann Tate, Laura Lunsford and Shelley Lampshire, to name but a few. I know several through Doll Street Dreamers and it's a proud moment for our online doll club when members get featured.

    Dr Con Traption is one of the pieces shown and you will just have to go out and buy the magazine to see the others!

    Friday, October 19, 2012

    Packing for Chicago

     
    So I'm packing for Chicago. I've been invited to be one of the guest artists at the Vogue Knitting Show next weekend. I am pretty excited, as you can imagine.
     
    I have had a dress rehearsal of my display , in my studio. I will only get one table and a cloth.  As I am flying, there are limitations as to what I can take. One suitcase, 50lbs max weight. Of course, there's carry on, which extends things a bit. Risers, lights, signs, all these would be great to take, but they all add weight.
     
    The dolls and vessels I shall take are not heavy individually, but 20 or so adds up. I had to come up with a lightweight riser that would collapse. I have used Ikea collapsible boxes before, but 10 of them gets heavy. So I made two shelves out of foam core, which I will spray black. I'll do a tutorial for these soon, promise! Since the dolls are not heavy, the foam core is adequate to hold my display.
    Dr Ventricle's Tonic
    Then there's the possibility of lost luggage. So, in comes carry on. I will carry several pieces with me, in the event that my big case is lost. It would be awful to arrive in Chicago with nothing. So, we'll call it carry on insurance! Then there's my sister, who is coming along to help. A great chance for some sister time! Plus, she's the big knit in the family (pardon the pun), so she'll enjoy the rest of the show. She is bringing along a few things for me. Trouble is, she gets on the plane in Toronto, so I can't give her any dolls. I'm flying from Ottawa on the same flight. Planning, planning. you can see where my mind has been lately, can't you?
     
    Dr Con traption
     
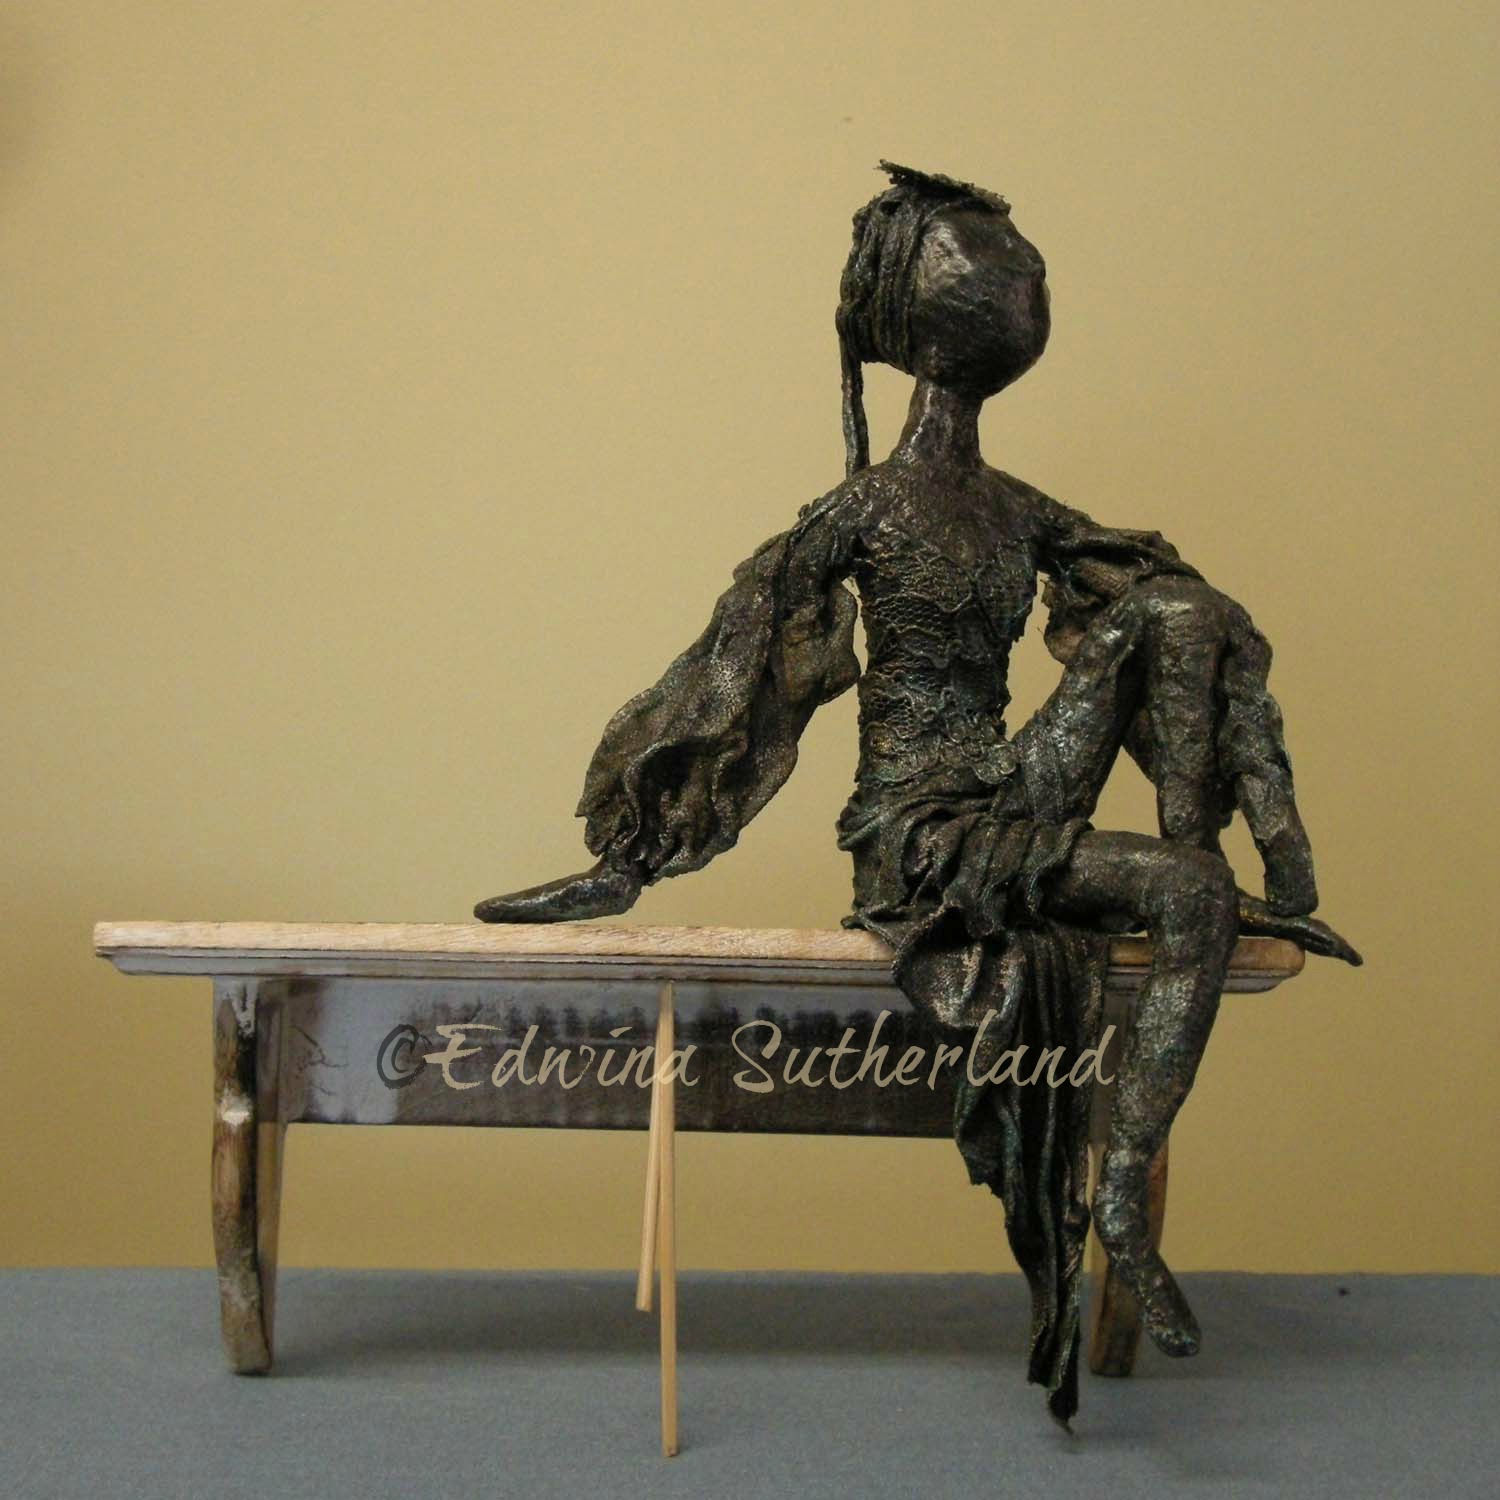
    Then there's which dolls to take? Nothing too delicate, so Dr Ventricle's Tonic must stay home. I just can't risk a broken bottle. Dr Con Traption is more hardy, though heavy, so he's allowed. The last piece pictured is Paverpol. I decided to leave Paverpol pieces at home. they are heavy, but also get mixed reception. Many people have done a Paverpol class by now and say the most odd things about my pieces. So, less rejection if I leave them at home. Oh! the delicate artist temperament!!
    Wish me luck!


    Paverpol piece "go"