Showing posts with label sewing. Show all posts

Tuesday, April 1, 2014

Sleeve for an e-reader

My daughter has an e-reader. Perfect for her trip to Europe. I'm amazed how many apps it has, beyond books!

Anyway, I made a sleeve to protect it from the rough life inside a back pack while touring Europe. I let her choose from some of my quilting cottons and she chose the map print, as a perfect companion for books and travel. She also chose a batik print for the lining. 

Back at the studio, and over to my sewing machine. I used a heavy Pellon for the stiffening. The kind you use to back fabric bowls and boxes. I fused the lining to it with wonder under. And trimmed it, leaving a seam all round the edges. Then I folded it with the lining inside and seamed the side and bottom. 

At this point, I realisesd I should have sewn the tab on while it was flat.  I made the tab with a lighter Pellon inside, turned it and added half of the magnetic fastener. You could also use a button to close it, but the magnets are neat.  This I now stitched onto the Pellon. I also glued the lining seam to one side, so it wouldn't roll when I put the cover layer on. A glue stick did the trick. 

I wrapped the outer fabric and checked the fit before trimming it, leaving a seam all round. I joined the side and bottom, them slipped this over the inner layer.  The other half of the magnet fastener was attached, then I folded under the top edge. I chose to reveal a small amount of the lining fabric, to give the top edge a little jazz. Top stitched it and it was done!  

It didn't take long at all and she loved it! Theses simple crafts can be so satisfying. Don't you find?

Friday, March 2, 2012

Corset making 101

It's been busy in the studio lately. When is it ever quiet? I've had boxes of fabric arriving for 1812 historic costumes, boxes of wool fiber arriving from Vancouver, ready to make more needle felt creations, fittings with clients, dolls, and so much more! What with a busy school schedule for my son, I've been over booked, to say the least!

Just what have I been doing? Well, for one thing,I have been teaching a workshop here at the studio, to three enthusiastic students. They are learning how to make corsets. All are skilled in their sewing and their enthusiasm for corsetry knows no bounds. It inspires me, as I show them some of the tricks I've learned over the years.

They began with kits from Farthingales online store. The coutil fabric, boning and pattern, plus all the notions were included. Linda knows how to put a kit together!


Here are two of the ladies, getting their corsets ready for grommets. You can see my grommet machine on the right. I use eyelets with washers at the back, for stronger lacing. These babies won't tear out! At this stage the corsets have been assembled, the boning cut and ready to insert. Once the grommets are in, it's time to have a first fitting.


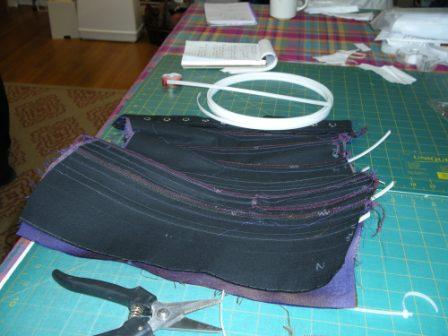
You can see the nylon boning we are using here. It's not Rigilene, but a German product called Desriaplast, which works almost like whalebone. It shapes to the body and provides superior support.


This shows the eyelets all set in. You can also see the boning tape visible as the white strip inside. These are useful when you want boning, but don't want the stitching to show on the outside.


Just for fun, here are two of my mini corsets, made for dolls. Stitching helps stiffen the seams, plus boning at center front and back!

Finally, here is my little darling, modelling one of my corsets. This one is created with Victorian styling, with straps included to make it the perfect evening bodice.

Tomorrow morning, the students will be back, to finish their corsets!