Showing posts with label needle felting. Show all posts

Friday, May 23, 2014

Fairy tales come true!

Wow! It has been a busy few weeks. You may have noticed my absence from the blogosphere. Moving house has taken up much of my time and I am heartily sick of boxes by now! I can't wait to pack the last empty one into the recycling pile. 

Life has not been all about moving. I have also been teaching. The Canadian Embroiderer's Association held their annual conference in Ottawa and I was invited to teach there. I had a fun time with my great group of students!  It was like a holiday in the midst of all that's been going on lately. To dip back into my wools and show people the joys of needle felting. 

The class was called Fairy Tale Felt Folks. We had two days to get all the wonderful characters to emerge and progress to being finished. I'm happy to report that nearly all of the pieces were finished. That left everyone with a good sense of accomplishment. Me too! It didn't take long before the students opted to stay in the classroom over break times and keep working. I love it when people get keen right away!

So here are the results. My own character was Puck, but while he made a great demo piece, he has yet to be finished!
We had a couple of Puss In Boots, and Crooked Men, some mythical figures and loads of imagination!


Friday, January 17, 2014

Divas rule!

I'll be teaching online again soon. At the end of January, Doll Street will host another needle felting class. Create your own Diva! I will take you step by step through the technique of needle felting and show you how to sculpt the face with wool fiber and create and develop the body parts. Finally, we will make interesting poses, like the diva shown here.

I'm also offering a kit, for those who need one. Just let me know the color you want. I always advise against making a flesh tone diva. using a non-traditional color takes the pressure off trying to make a realistic face and body.

Class begins January 31, 2014. Follow the link to register today.

Tuesday, November 19, 2013

Polar bears heading your way!

I finally have my latest project ready to share with you. I am so excited! First, I made a whole gang of these little guys, to test out the method and make it as simple as possible, so that anyone can do it.
Somehow, the polar bear has been associated with Christmas. I guess they live near the North Pole, so they must know Santa, right? A better symbol than the penguin, which lives at the South pole!

Needle felting is fun and simple. Children can do it too, though not the very young. Under age ten would need adult supervision for sure. Felting needles are very sharp, that's why! This would be a good project to make together. The older person could do the actual felting needle work, while the little ones wrap the wool.

I am busy today, adding this to my web site and Etsy.

All you need is less than 1oz of wool fibre and a felting needle, some chenille stems and you are set to go! If you want one, I can put a kit together for you. Just send me an email through the web site!

Friday, November 1, 2013

Needle felt with a twist

Hands up if you have an embellisher!  Is it getting dusty on a shelf? Well, so was mine! So I got it out and went to work. I wanted to see if I could produce a vessel as good as what I can make when wet felting. 

Here's the result.  What do you think?
What is that for? Someone asked me. Well, it's an objet d'art. You might put a battery powered candle inside ti, to shine through the holes. you might put dried grasses in it. Or just enjoy it. Felt is so touchable, so pick it up and touch it!
I'm writing an article for a magazine. Not sure which one yet, but I will let you know. I am also open for suggestions. There are so many magazines out there now!

You can see I have retuned to my love of things with holes in them. I had some concerns about cutting into needle felted felt, but it was fine.  It even allowed me to give it a shave!  I just like to control some of the fuzz. One of the wools I chose did not behave as well as I would have liked. So I took care of the fuzzies with my scissors. 

It felt good (pardon the pun) to be felting again. You can imagine, I have a stash of wool fibre! So there are other color combinations to explore. I can see a bag happening soon!

So please send any suggestions for magazines! 

Friday, October 4, 2013

Perfect Pets

I am teaching again! After my hiatus, it feels good to be back teaching again. I am teaching online at Doll Street Dreamers.  If you've never taken an online class, the classroom is a group which you are invited to moon, you get to download the instructions and ask me questions in a private forum. Bets of all, we can share pictures as we progress. Just like a real class, you can see what everyone else is doing.


The class is called Perfect Pets and teaches you how to make a needle felted cat or dog. Perfect for accompanying your dolls! The class shows you how to scale the animal  l so it fits your doll, how to make a simple armature and of course, how to needle felt. 

It will be a lot of fun and add to you doll making skill set. Won't you join me? Here's the link to the class

Friday, August 10, 2012

Using your head


Today and all weekend, I'm working on finishing some stuff. I do have an art show coming up next month, you know! (The West End Studio Tour)

So I took a look around the studio and saw all these heads. One has a body begun, this guy above. I love his snooty look, so he may be destined to be another Marquis. He's needle felted.


This guy I made for a joke. You may recognise him. He's Gru, from the movie "Despicable Me." He may not get a body, perhaps just becoming a pin or brooch. Then he'll be a pin head! I like him though. He's been on my felting foam for a long time keeping me company.

This is a hobbit head. The first picture is the before. He's been sitting here, not quite pleasing me.
So, I grabbed him and adjusted the expression of his mouth. I'm happier with him now. So then, while using picmonkey to add my name to the photos, I saw this new game. How does he look now??


So I'd better get to work on making some bodies!! Have a great weekend, everyone!

Friday, May 18, 2012

Bears, oh my! On sale two more days!

This past week, I've been busy with needle felting stuff. It's always so relaxing to get back to poking away with my needle. There's a challenge in Cloth, paper, Scissors, which I must enter. One of my flat pieces needs finishing for the occasion.

New Tutorial

But I digress, I was going to talk about my Bears. I made some new ones and wrote a tutorial while I was at it. Once you understand the techniques, you can make these in a few hours. The tutorial has step by step photos, loads of them!! You'll be needle felting tiny Teds in no time!! Click the yellow Ted to see the tutorial.

Kits on Sale

To help you along, I've had the kits on sale this month. All kinds of kits, not just bears. Two more days, if you want a kit with 20% off!! Click the picture to see the kits.


This guy is so funny. I love the patches on his eyes and his paddy paws. All added with wool fiber and needle felted on. You can customize these in so many ways! I taught this as a class and one of the ladies made one in the colors of her favorite hockey team, complete with logo on his chest! Just think who you could make such a bear for!

Newsletter


Don't forget, if you sign up for my monthly newsletter, you get this free pattern tutorial! Why don't you join me? Just click the image to go to the site.

Friday, March 16, 2012

History on Display

Blogging is Fun
When you get to spread it around. This Tuesday, I was a guest blogger on The Magic Bean. There's a new tutorial available on making a wig with upholstery fringe. Here's the picture! You can have a lot of fun with this one!

I'm also having fun with my newsletter, which I sent out this Thursday. If you aren't a subscriber, sign up on the site, by clicking the highlighted link. Big thanks to all my followers and subscribers for your support. Your comments and emails mean so much to me. They keep me inspired!

History on display


After months or working on it, the first of our doll club's Daily Life in 1812 project is on display at Artemisia gallery in Westport, Ontario. It's time to start commemorating the War of 1812, Canada's war with the U.S. The other sculptural works at the gallery were really interesting. If you're in the area, do go and see the show. I created General Brock and decided to mount him on a horse. The horse was needle felted. I took pains to get the scale right - We were working in 1/6 th  scale. The neck may be a little short, but overall, I'm happy with the horse. The hooves are apoxie sculpt.

I didn't get his saddle done, but a regimental blanket goes a long way to giving the right impression. I did make the harness. The fiber for the horse is new stuff I just ordered. You'll love working with it for your needle felting projects. I have so many new colors, just ask for those you want! Click this link to see how many wool colors I have in the store, with more to come!

A Uniform effect


I simplified the uniform somewhat, as I talked about last week on The Magic Bean article. Here's the general, close up. His head is needle felted. Note the hat, which was copied from an original bi-corn hat I happen to own. It's not that old; it's a mason's ceremonial hat. I don't think they use them anymore. Correct me if I'm wrong! I'd love to know. But you know secret societies and their secret ceremonies!


Almost Finished
So here's the finished general, mounted. He looked pretty good at the gallery. The mane is too curly, but I may replace it when I get it back. He'll get a saddle too, once I work out how! Next thing to work on ....


Friday, February 17, 2012

Needle felted Dogs, part two!


So last time I talked about sizing your mini pet. This time, let's give you a tutorial on how to needle felt. I teach this as a class, so look for it coming soon, online!!


Lay it on the profile picture to check the size again, and then adjust it so your dog stands by itself. I begin adding wool fibre in thin strips, winding it tightly around the wire skeleton. Once you have covered the whole skeleton, tack the ends in place with a felting needle. You need to work on a sponge work surface when felting. Add more fibre to thicken the body and legs. The tail will need more at the base than the tip.


Now you have well covered the skeleton, begin adding muscles. A dog is fatter below the spine than above, so to continue winding around the spine would create a cartoon shape. Add pads of folded fibre under the spine, to thicken out the ribs and belly. Back legs also need thicker haunches, so add pads of folded fibre here too. Keep felting as you add each layer and build the body up gradually. Keep referring to the picture.


Take a close look at the shape of the head. This is what distinguishes one breed from another. It begins round, and then shapes into the snout. This can be added once the top of the head is established on the neck wire. Eyes can be added with dark fibre rolled into tiny balls, or use black glass beads and stitch them into the head.


Ears are made by laying out two equal amounts of fibre. You don’t need much! Fold each pad into a triangle and felt it into the ear shape, leaving the wide edge loose, for attaching to the head. Felt the ears in place and give the dog some character! Who can resist a tilted head and a cocked ear?


That’s it! Add spots, extra big feet or whatever brings the dog to life. Give him a collar in leather, too! Maybe a leash for walking will finish off the new pet. Using a profile picture, you can create many kinds of animals in all sizes.


Friday, February 10, 2012

Needle felted dogs

Time for a tutorial!

Have you ever wanted to create a companion for one of your dolls, but struggled to find the right size dog or cat? I'm going to show you how to create a dog to scale, with good proportions. The same rules will apply when creating any miniature animal.


Start with a profile picture of the dog; if it shows the dog in motion, so much the better. I find these images in magazines and online, or you can use a photo of your own pet. Now calculate the size of your pet. You might use a proportional scale, which calculates relative size in a flash. These can be found at art supply stores. Or, do it intuitively. If your golden retriever's head comes to your thigh when he's standing, then the mini retriever will reach the thigh of your doll.


Resize the picture using a photocopier. Now take two pipe cleaners. Bend a tiny amount under at one end of each pipe cleaner. Lay it on the picture and measure the front foot. Bend the wire at 90 degrees and bend the second wire to match. Now measure the wire up to the shoulder. Don't go right to the top, since the skeleton is inside the flesh of the animal. So, leave room for the muscles on top of the wire skeleton. Make another bend, to add some shoulder width to the frame. Bend again, where the spine begins. Bend the second wire to match, and then twist the two together along the spine, measuring against the picture and ending just before the tail. Bend out the hips as you did the shoulders and then bend down and measure the legs. I follow the curve of the back legs, and then bend the foot. Finish the foot by bending under the ends as I did at the start. Cut off the excess wire.


Now take another pipe cleaner and measure the head size. Bend it back on itself, then bend and measure the neck. Place this against the shoulders and twist it around the spine. The other end will be the tail. Measure this and bend under the end, cutting off the excess.


Lay it on the picture to check the size again, and then adjust it so your dog stands by itself. Not so hard! Now you are ready to build the rest of the animal, which I will cover in my next post.

Friday, January 27, 2012

Craftsy - the new platform for crafts

I just joined Craftsy.com and have listed a couple of things to get started. First, is my Noggins pattern. I can't believe I haven't shared this with you before! I created them and the pattern sold quite well on Etsy over Christmas. I love mini stuff, because it doesn't take long to make.

Here are the Noggins. You can see they are not just for Christmas, but can share your house every day! Noggins like to live in the corners of dusty bookshelves, guardians of your library. They also like to read a lot, so if you ever can't find a book, chances are they've had it out to read!

I found these guys in the hall closet with my felting books! Do they know what felting needles do? What are these guys up to? I also have them for sale on my web site, www.edwinadolls.com so you can shop there too!

I also added a project, in the form of my Tiny Ted Tutorial. These guys are the next step in needle felting. They are such fun to create and once you've learned the basics, you can customise your bears anyway you like! Who can resist teddy bears?


Friday, July 15, 2011

Works in progress


It's when inspiration strikes, that you have to get to work. No matter that there are other works left undone, strike while the iron is hot! In this case, I thought of a way to create the dragon's claws.

I'm into dragons just now. It could be the coming Harry Potter movie, which has me all excited, or just that dragons are cool, in a hot kind of way. I wanted this one to have a decent wire armature. We learn as we go. I took Kate Church's class in May and she showed us how to wrap a wire joint with hockey tape, to make it stable. I was using floral tape and that seems to have worked just as well. Especially considering that felt work is light weight and the wire used not to heavy.

So that was step one. Then I wound the wool fibre around each wired toe to get my claws. I built them up , so that I can add the other colour later. Success. Last night I added basic fiber to the body and neck and added a stump for his head. Just the beginning.


It looks a bit duck-billed right now, but I wanted to have a decent open mouth roaring at me when it's done. I've added flaps for  lower jaws before and don't find them a satisfactory as a wired jaw. This morning I concluded that the pose will be one of rearing up, with his front legs in the air. So it will probably need a weight to help the pose. Out into the yard to find a stone...

Inspiration also struck while on a road trip. needle felting is great to do in the car. I made this head while away over the Canada Day weekend (July 1st for those non-Canadians!)

His eyes need the highlights, but I am pleased with his look. I picture this guy in 18th century costume, breeches and tail coat, perhaps looking down his nose at something. He may get a bit steam punk, but we'll see.

Here's the beginnings of his body -


I didn't have the right colours with me when I was away, so I'm just getting back to his creation now. I also must decide if he'll stand or sit. Standing requires planning...

Do you like dolls on stands or not? I'm in two minds myself.


Friday, March 11, 2011

Dancing in the Moonlight.

I finished this piece a while back, but totally forgot to take a photo and share it with you.

It's needle felted using Corriedale fiber, which is one of my favourite wools to needle felt with.

Dancing in the Moonlight

I found the base on a floral display, so immediately saw it as a base for a doll. I had to wire her feet to it, which meant reworking them a bit, but I think I pulled it off.


Dancing close up

This time I didn't wire the hands. I can make them much more delicate if I don't wire them. The figure is 13" tall from her toes to her finger tips. It was a challenge to create the face all in white and I did consider some colour for the eyes, but finally left it white. I used the suggestion of eyes, by making the lids half closed. I saw this on a stone statue and thought it very effective.

Needle felters can learn much from statues.

I saw her dancing in the moonlight, a figure lit by the light of the moon. She'll be up on my Etsy store soon. maybe today!

Friday, March 4, 2011

Have you tried Felting?

If you haven’t tried the many styles of felt making, you are missing a big part of the textile arts experience.

The hottest trend in the fibre world right now is felting. To take beautiful colours of wool fibre and turn it into something useful, like slippers or a bag, or something sculptural like a vessel, is to witness the most amazing transformation. Let me introduce you to the different methods of felt making available to today’s fibre artist.
Wet felted bag


  • Wet felting is the oldest form of felting. Using wool fiber, the magic of wet felting will produce a small bag, a vessel, any shape you want! Wet felting is the process of removing air from the wool fiber, which is stacked in organized layers, wetted with water and soap and massaged, rubbed and finally formed into a felt object. This magic process makes fiber into felt. Dating far back in human history, felt has been there, providing warmth and comfort. Clothing, tents, yurts (a round shelter) and many other practical items have been produced this way.
Pied Piper - needle felted


  • Needle felting is one of those arts that have evolved from industrial uses. The humble felting needle is secured in a bed by the thousands and used to produce things like carpet underlay, felt boot liners, insulation and quilt batting. Taken by itself, it becomes a very versatile tool for the fiber artist. Without stitching a shape or stuffing, a figure can be built, layer by layer with wool fiber and one simple tool: the felting needle. A face can be detailed entirely with colored wool using this method. The possibilities are limitless!


  • Knitting - Many knitters are having fun with felting: knitting hats, bags, mittens, etc. with wool yarn. These are then placed in a washing machine to shrink and become felt. This process is properly called “fulling,” though it is commonly referred to as felting. It results in felt fabric, which is strong, warm to wear and beautiful.


  • The Embellisher machine - The newest comer to the felt making scene is the embellishing machine. An embellisher is a sewing machine of sorts, without thread or feed dogs. Felting needles do the work of needle felting, inserted singly or in groups in the needle holder of the machine. Using the machine, flat pieces of felted and embellished work can be made. Many fiber artists and quilters are creating wonderful work with this single-purpose machine.
So try playing with wool if you haven't already. There are so many styles to choose from. I love it and am very passionate about felting in all it's forms. You can find kits and supplies on my web site, Edwina Dolls.

Friday, December 17, 2010

Bear-y Christmas!


This little guy is going up on my Etsy store, Not Carved In Stone, today. I love making bears. One or two of my bears will be given as gifts this year. I needle felt them fairly firm, so they are squeezable. They are also string jointed, even the heads, which makes them pose-able. I used to attach the limbs permanently, but found people want to manipulate the limbs and head, so that didn’t work. Nothing causes more dismay than your bear’s head coming off!

I’ll be taking a Christmas break from blogging, so want to wish everyone a Merry merry Christmas or whichever holiday you celebrate.

Let’s all wish for Peace. Namaste.

Friday, December 3, 2010

Raining cats and dogs


I have one more show this holiday season, at Fisher Park School. I have created some mini cats and dogs, which I am sure will be popular. I took this picture, which I thought looked like a herd on the move.
I might set them up so that they "chase" the penguins. They are made from wool fiber and needle felted over a wire armature. I'm an animal lover, so these are favourites of mine.

Wednesday, November 17, 2010

Show time!

Busy, busy with my felting needle! This week I created some needle felted penguins, a polar bear and a sheep. I am very pleased with the penguins, which I haven't tried before. How many to make, that is the question? I saw the idea on Martha Stewart's site. Of course, many people make penguins, but I felt it right to give credit for the idea.

My sister loves penguins and has quite the collection. They seem to be associated with Christmas now. I am not sure why as they have no relation to the North Pole, Santa or Christmas, but there you are. They are creatures of the snow, is the only connection I can make.

I am almost ready for the next show at St Stephen's Church in Ottawa, on Watson street. It takes place on November 27, from 10 to 3 pm. It's my first time at the show and I hear it's a good one. If they don't sell at the show, look for them in my Etsy store. It's called "NotCarvedInStone" if you are looking for me.
I am also selling my needle felting and dolls at the Fisher Park craft show on December 4. It's held at the school on Holland Avenue, Ottawa. I hope to see you there!

Sunday, June 20, 2010

Bags and bodies blossom in Vermont!

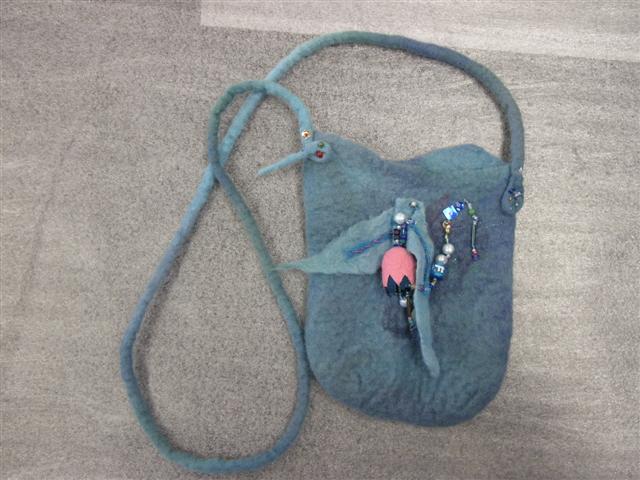
Bags Blossom in Vermont! Look at these fabulous bags.


I am back from my trip to Vermont. The college campus was at the top of a beautiful Vermont valley. The view was splendid, in between the rainy bits!
I had a fabulous time with the ladies at the school. My class in particular were a lot of fun.
I learned a new vocabulary that weekend, with my first major exposure to rug hooking. The designs and quality of the work blew me away. The design lecture by Peg Irish showed amazing rugs.
But on to the class...


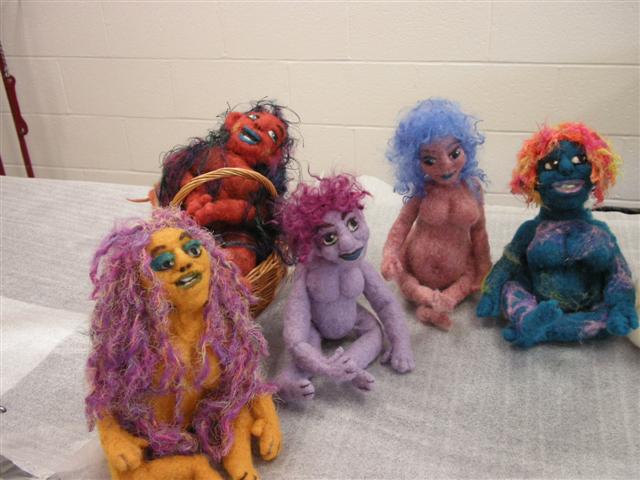
Here are some pictures of the girls at work. Having them for the whole weekend was great, because we could move back and forth between our wet felted bags and needle felted Hot Mommas.


While the bags were drying, we began our dolls. The bags were embellished on Sunday morning, ready for the noon show and tell, then in the afternoon, we finished the Mommas. What goddesses they are!